Submitting an electronic signature to the eKRS – compliance with the National Accounting Standards
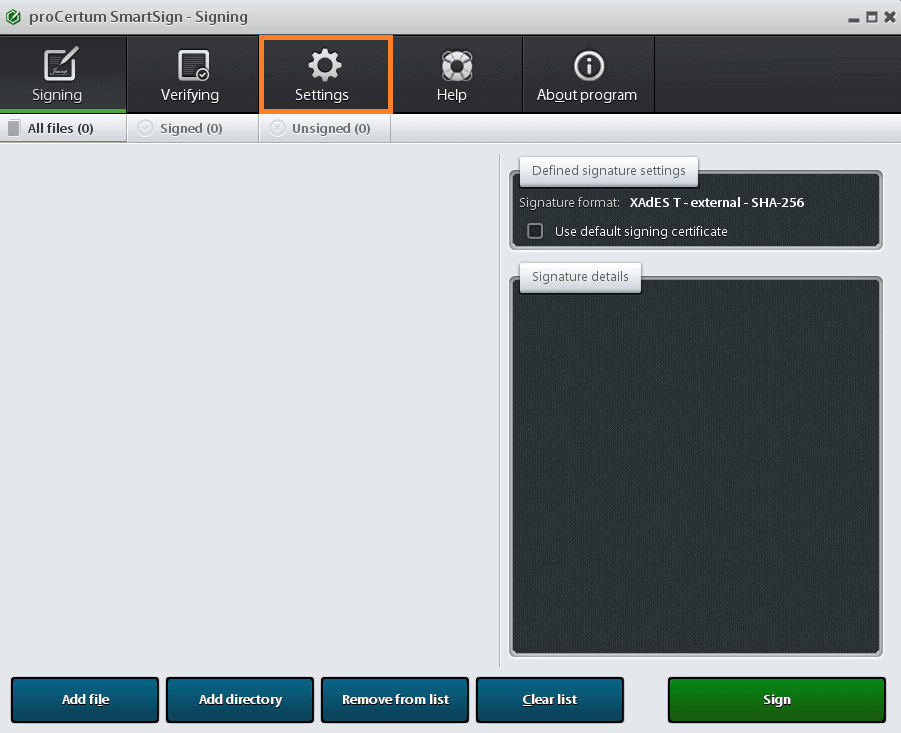
Step 1
Select "Settings"
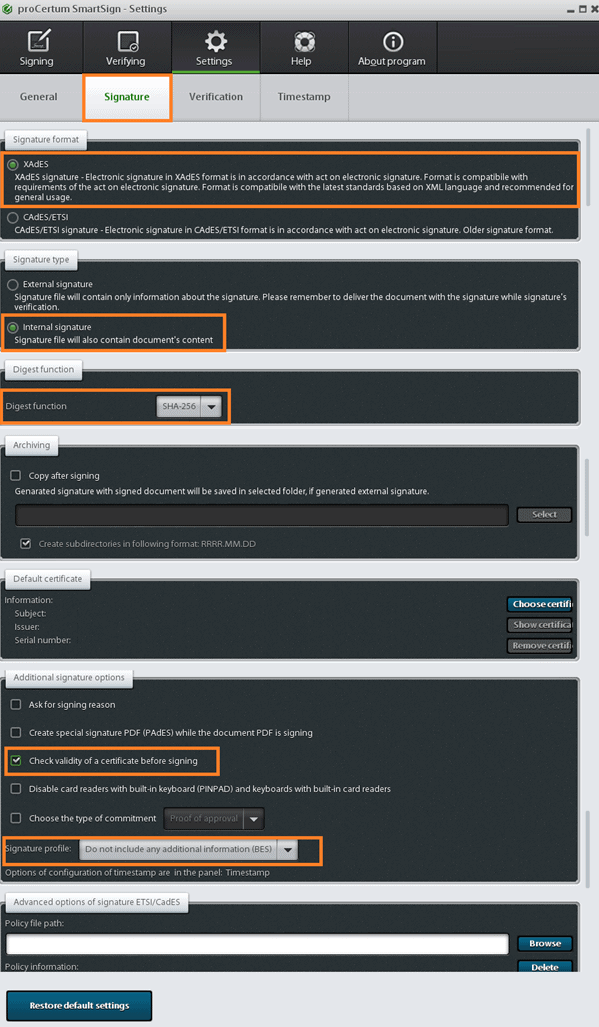
Step 2
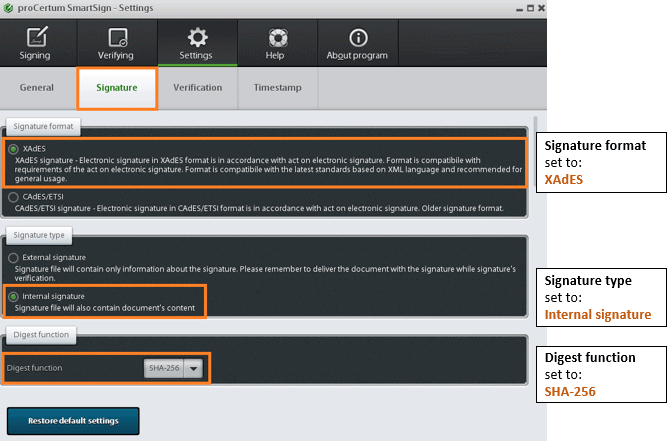
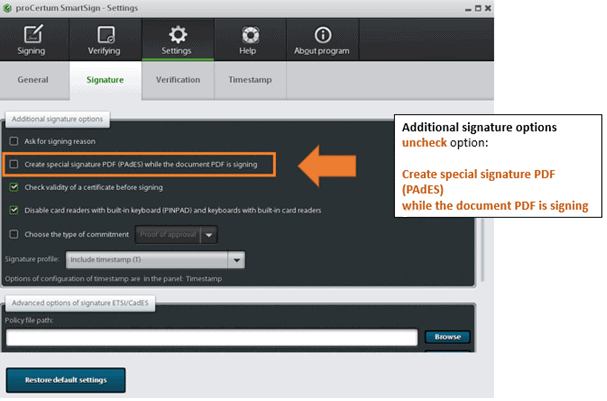
Set the following parameters in the "Signature" tab
- Signature format: “XAdES”
- Signature type: “Internal signature”
- Shortcut function: “SHA-256”
- Archiving: “Create subdirectories in the format: YYYY.MM.DD”
- Additional signature options: “Check the validity of the certificate…”
- Signature variant: “Don’t include additional information (BES)”
Step 3
Adding another signature to a signed file
Note: if you have already signed the document with a qualified signature, do not reopen the file to correct or check it. This may cause errors that make it difficult to read the document
In order to sign the document with another qualified certificate, it is necessary to:
- Start the proCertum SmartSign program
- Click the “Add file” button and select a signed file (with .xades extension)
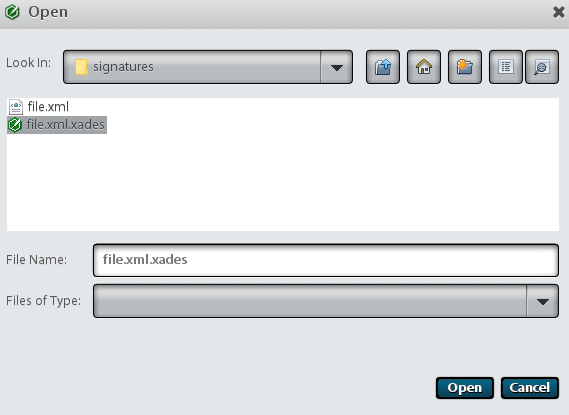
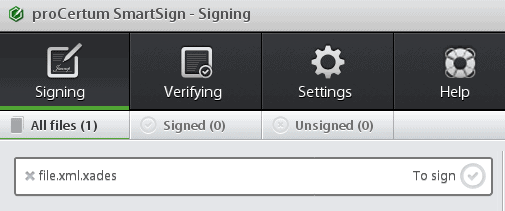
- Click on the “Open” button – the file will be added to the list of files to be signed
- Click “Sign” – the signing process will start. The certificate selection window will appear
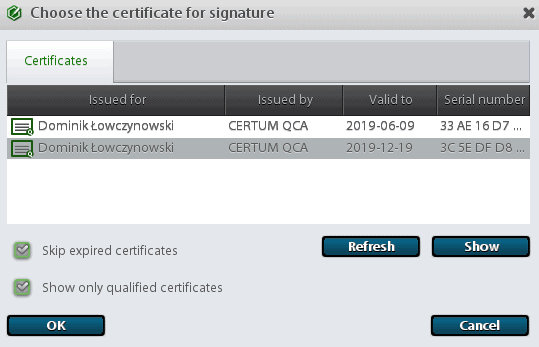
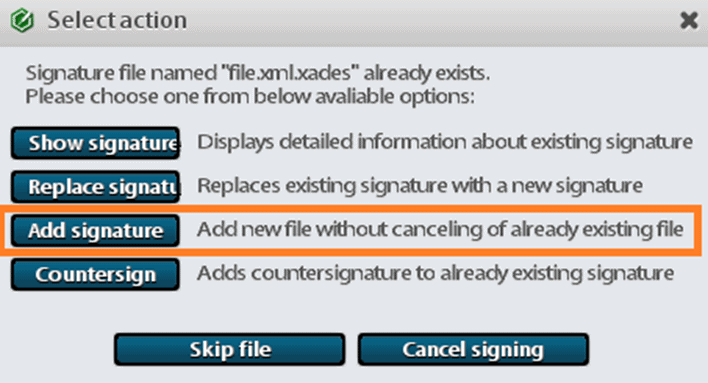
- Select the certificate and press “OK” – a window will appear allowing you to add a signature
- Click on the “Add signature” button – a window will appear in which the PIN code should be entered into the selected certificate
- Enter the PIN code
- Confirm the entered PIN code – the signature process will begin – after adding the signature, a window with a summary will appear

- Press “OK” – you will return to the list of files – you will see two signatures placed under the signed file
Sending documents to eKRS signed in the proCertum SmartSign application – compliance with International Accounting Standards (IAS)
-
- Create an account on the website: https://ekrs.ms.gov.pl/rdf/rd/
- Sign the documents in the proCertum SmartSign application – download the application
- Setting up the proCertum SmartSign application before signing

- How to sign a document in the proCertum SmartSign application
- Start the proCertum SmartSign program
- Click on the “sign” button
- Add the file you want to sign to the file list
- Click on the “Sign” button
- How to add another signature to a signed file
- Start the proCertum SmartSign program
- Click the “Add file” button and select a signed file
- Click on the “Open” button – the file will be added to the list of files to be signed
- Select the certificate and press “OK” – a window will appear allowing you to add a signature
- Click on the “Add signature” button – a window will appear in which the PIN code should be entered into the selected certificate
- Enter and confirm the PIN code – the signature process will begin (after adding the signature, a window with a summary will appear)
- Press “OK” – you will return to the list of files – you will see two signatures placed under the signed file
- Then log in to your KRS account and add signed documents and send them.
Sending documents to eKRS signed in the proCertum SmartSign application using SimplySign
-
- Create an account on the website: https://ekrs.ms.gov.pl/rdf/rd/
- Sign the documents in the proCertum SmartSign + SimplySIgn Desktop application – download the application
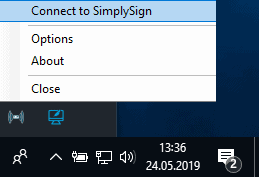
- Start the SimplySign Desktop application and select “Connect to SimplySign” – a command that allows you to connect to the service and access virtual cards
-
- Setting up the proCertum SmartSign application before signing

- How to sign a document in the proCertum SmartSign application using SimplySign In order to sign the document it is necessary to:
- Start the proCertum SmartSign program and log in to the SimplySign Desktop application
- Click on the “sign” button
- Click on the “sign” button
- Add the file you want to sign to the file list
- Click on the “Sign” button
- How to add another signature to a signed file in the proCertum SmartSign application using SimplySign
- Start the proCertum SmartSign program and log in to the SimplySign Desktop application
- Click the “Add file” button and select a signed file
- Click on the “Open” button – the file will be added to the list of files to be signed
- Select the certificate and press “OK” – a window will appear allowing you to add a signature
- Click on the “Add signature” button – a window will appear in which the PIN code should be entered into the selected certificate
- Enter and confirm the PIN code – the signature process will begin (after adding the signature, a window with a summary will appear)
- Press “OK” – you will return to the list of files – you will see two signatures placed under the signed file
 The verification process and documents required after the purchase of the Certum electronic signature
 The process of renewing a qualified certificate on a cryptographic card
 Drivers for cryptographic card readers
